February 23, 2007

A Humument


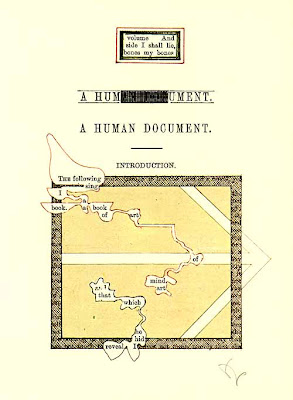
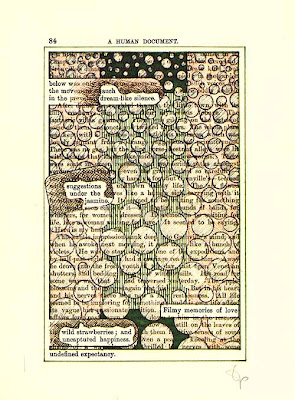
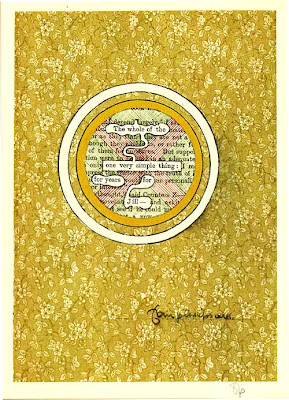
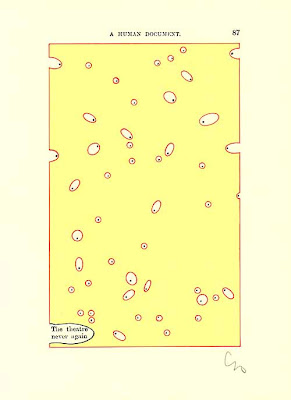
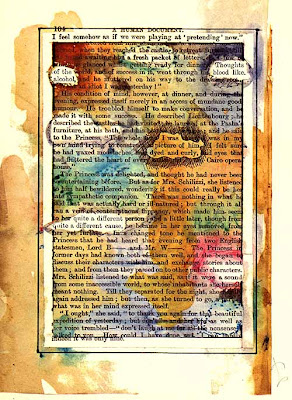
Have you ever taken a page from a magazine or book and "edited" it to your liking - crossed out most of the sentences except for a few choice words, which, when read in their new sequence, take on new meaning?

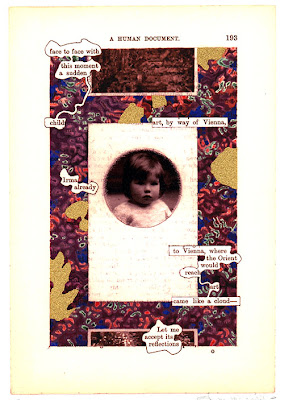
The above is the first of 370 pages in a 19th century text transformed into hundreds mini-canvases. I thought this might be fitting, considering we are starting to talk about collage and appropriation. CLICK HERE to see a the full 370 page gallery of Tom Phillips' eternal work in progress. You can also click on the image above for a larger view of the first page. I have included, after a introductory blurb, which I borrowed from the humament website, a few more sample pages/pictures below. Again, click on each of the images for a better (larger) view of each page.

"A HUMUMENT is eternally a work in progress. Tom Phillips started his treatment of W.H. Mallock's Victorian novel in the mid sixties and an initial complete version was privately published by the Tetrad Press in 1970.

With Thames and Hudson's first trade edition in 1980 A HUMUMENT rapidly became a cult classic. It was seen to be a defining product of post modernism linking traditions as various as medieval illumination, experimental poetry and non-linear narrative with the procedures of modern art."
February 21, 2007

Earth, Wind, Fire, Water


Students in UNCW's 6X1 class were assigned the task of representing "the four elements," using 16mm clear leader, inks, paints, salt, oil, magazines and packaging tape. The video is a class compilation of each of the one-minute "element" projects.

Sci-Fi, Horror or Circus Theme?: The Class Movie Gig

So, as I mentioned in class, now that we have all these hand processed strips, the next task is to create sort of a collage video which makes a whole of all these separate parts. The only stipulations are that this be a video in four parts (each part, one-minute long) and that each person in the class participate in a designated role. I'll pass around "a hat," from which you will draw your position. If you want to swap positions, fight, pull hair to get what you want, etc. fine - as long as all positions are filled.


What will be the genre of this movie? . . . a bit experimental, of course. But beyond that, it's completely up to you: Western, Musical, Musical Western, Infomercial for the Dammed, 50s Melodrama, etc. Everyone in the class has a specific role but all are welcome to pitch in on genre ideas and semi-narrative themes when we watch the spliced version in class, next week.

Below is a list of all the roles with the number of people needed in each role and a basic description of the job.

Log and Capture/Tape Wrangler (1): Log and capture the footage

IMAGE

Rough Cut Editors (4): Assemble a rough cut of the four parts and add a title and also an inter-title (for each of the four parts). Each section need not be a minute long at this stage and, in fact, may only be 30 seconds long. That's fine. The Fine Cut editors will stretch out the footage to a minute per section.

Fine Cut Editors (2): Slow down sections (be mindful of frame-blending/whether or not you want it), super-impose or loop sections.

SOUND

Dialogue/Voice (1): Find some interesting bit of narration or voice that seems to fit the theme. archive.org might be a good place to start. Lot's of rights-free stuff from the mundane to the bizarre. Look in the audio section.

Ambient (2): You can record your own on mini-dv or find some online or . . . just use your imagination. Remember though that ambience implies background so your sound should fit this description and not upstage the voice or snd fx. It should also be something that is capable of stretching through the length of any one section.

Sound Effects (2): Again, create your own or find fx on line. Typing in "free sound effects" in the google search bar will turn up a lot of results.

Sound Mixers (2): Make sure the three above tracks are mixed properly - that they work with each other and don't all scream for attention at the same time (unless that is your intention . . . for part of the film).

Print to Video (1): Print that bad boy and turn it in to me.

February 14, 2007

Hand Processing Footage


The above example is a result of laying objects directly on unexposed film and then exposing the film to light - a process of creating Rayograms. Below you'll see an itemized version of the above 16mm handprocessing demo footage from the 6X1 class. Various objects such as glass beads, salt crystals and rice were placed directly on strips of 16mm hi-con film (Kodak 7363), the film was then briefly flashed to light and processed in Dektol developer. This filmstock and developer are ideal for the process because it allows filmmakers to see the film develop before their eyes, under a red safe-light.

Pictured first in each of the below examples is the filmstrip as it would be seen in its physical form. Then there is a very short video clip that shows that filmstrip as it would appear projected. Oh, and a little frame blending was applied to the video. I actually prefer the above composite video without the frame blending because you can more clearly see the objects on the film - but hey, that's just me.

1. Glass Beads and Bubble Wrap

(click on image for larger view of filmstrip)


2. Super 8 Film Footage: Telephone Booth Number Pad
(click on image for larger view of filmstrip)


3. Contact Printing: Stars and Leaves

(click on image for larger view of filmstrip)


4. Contact Printing: Sliced Up 16mm Stock Footage Taped to 16mm Clear Leader

(click on image for larger view of filmstrip)


5. Rice, Salt and Pushpins

(click on image for larger view of filmstrip)


February 7, 2007

Animation Shoot (. . .and me without my sound)

So I was walking around to each of the four animation groups, during our class shoot and because of the different conversations I heard filtering throughout the classroom, I decided to shoot some video. In addition to capturing some video of 6X1ers working with the multi-plane animation setup, I wanted to get such comments on tape as:

“The bug people are going to come down and destroy. . . “
“Make the mice run up and eat the jelly beans. . .”
“He can fly away because he’s got a jetpack.”

. . . all from different corners of the room.

But what made this conversation especially surreal is the logic and calculation that went into each of these comments and the sincerity with which they were received.

Well, I was about to log and capture these snippets and upload a short video, when I realized that unfortunately there was no sound on the tape. So I pulled a few stills from the video, instead.

Here it is, The 6X1 animation shoot.


February 4, 2007

Photograms and Rayograms

For our third 6X1 assignment, we will be taking strips of unexposed 16mm high contrast film (Kodak 7363) and exposing the strips using various techniques. One of the techniques with which we will experiment is laying random objects (lighters, salt, beads, paper clips, etc.) on the unexposed filmstrip, flashing the filmstrip with low-level light (I find that cell phone light works well) and then processing the strip of film under a red safe-light. Our processed strip will appear as a negative. In other words, white areas on the filmstrip will indicate where the flashed light was blocked from the filmstrip and black areas will indicated where light hit the filmstrip unobstructed. The shades of grey will indicate translucent areas on the object that allowed some light to pass through to the filmstrip.

Below is an image of a photogram using a very similar technique to what we'll be using in class. The main difference is that the artist, whose work is pictured below, placed objects on photo paper that had dimensions exponentially larger than the dimensions with which we'll be working with (the 16mm frame). Oh, and another difference: the photogram below has been toned (something we'll talk about later) blue.


So, for example, we would have a very different experience seeing the lemon slices projected on 16mm film than we do viewing the picture, above. If we were to lay these lemon slices on 16mm film and process accordingly, we might see magnified chunks of lemon slices flashing by - a bit of a rind here, some pulp there. For the most part, the lemon slices would be abstracted. Keep this in mind when choosing the size of the objects you will bring to class for this exercise.

All 6X1ers should CLICK HERE and print out the Assignment 3 guidelines.