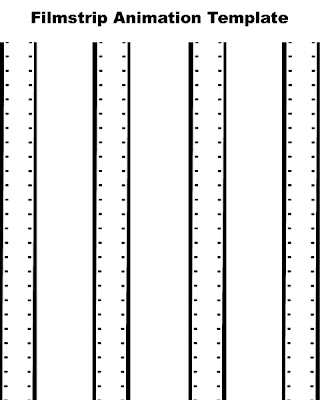
First off, the standard speed for 16mm is 24 frames per second. I have given you a FILMSTRIP ANIMATION TEMPLATE that looks like this:

You’ll notice that there are 4 rows containing 25 frames, each. So each row represents just a smidge over 1 second. Remember that one frame of 16mm is the square formed by any 4 neighboring sprocket holes.
Now, for the animation:
Let’s say the first shape on your filmstrip animation template is a circle and let’s say by frame 25, you want that circle to morph into a square and you want the morph to be gradual.
Once you have your beginning (frame 1) and ending (frame 25) shapes for this 25 frame sequence, you’ll want to go to the midpoint between those two frames (frame 12 or 13). There, you’ll draw a squircle (half-square/half circle).
FRAME 1 - START

FRAME 12 (or 13) - THE MIDWAY POINT

FRAME 25 - END

You’ll then go to frames 6 and 18 and create two new midpoints.
FRAME 6 - THE MIDWAY POINT BETWEEN FRAME 1 and 12 (or13)

FRAME 18 - THE MIDWAY POINT BETWEEN FRAME 12 (or 13) and 25

Below are pictured the 5 keyframes side by side (you can see more clearly how this will animate).

And below is a rough, 5 keyframe animation. Note that this animation loop is 1 second long so about same the duration as your frame 1-25 animation when projected.

At this point, you have 5 keyframes and you can “tween,” or draw the frames in between, those keyframes by providing subtle frame to frame transitions. Keep repeating this process for the other three columns until you come to your end frame (100).
Once you have your template the way you like it, tape your filmstrip down enough so that it sticks but not so much that you can’t lift it up and adjust the filmstrip (without your paper tearing) to make sure it is aligned with the sprocket holes and also move the strip from column to column. You are ready to ink your film! If your sharpie isn’t offering a dark solid line (if it’s a bit watery) you may need to ink on the other side – just retrace the shape.
If you need another filmstrip animation template, CLICK HERE.

3 comments:
it really very good.
I love it !
I like it !
thanks :)- .
Bathmate
Nice brief and this post helped me alot in my college assignement. Thank you for your information.
i really love your own writing way, very attractive.
don't quit as well as keep creating because it simply just that is worth to look through it.
excited to find out alot more of your current stories, enjoy your day ;)
Post a Comment