January 31, 2007
Magazine Transfer Exercise
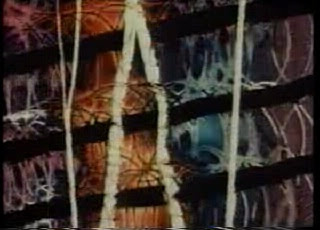
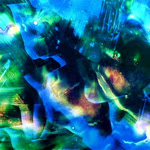
The above video is a compilation of all the magazine transfer segments we created during the second class period of 6X1.
For those of you who are visitors to the class blog, the process for the above film involved strips of 16mm clear leader film, magazines/newspapers and packaging tape. Students pressed bits of torn up newspaper and magazine to the tape, submerged the tape in warm to hot water for five or so minutes and then rubbed the paper off the tape so all that remained on the tape was the ink. The tape was then laid directly onto the clear leader until it dry and the adhesive bonded to the film.
All the segments of film were then spliced together, put on a reel, projected and transferred to video.
January 29, 2007
Where Animation Meets Film Manipulation
The first two weeks of class have been spent diligently scratching, painting and otherwise manipulating 16mm film. This week (week 3) we’ll finally have a chance to see the results of our efforts on the projector.
This will also be a day when we make a subtle transition from film manipulation to animation. This week we will watch Norman McLaren’s 1949 animated short, “Begone Dull Care.” Like the Brakhage and Scratch Film Junkies’ films we saw on the first day of class, McLaren’s short utilizes direct film manipulation. However, in “Begone Dull Care,” we begin to see “characters” emerge in the form of shapes and lines that synchronize with the music. Compare this to the Junkies film we saw on the first day of class, where the music, it seems, is performed live as a response to the visual. McLaren does the opposite. The images in “Begone Dull Care” are a response to the music.
The 100-frame animation (detailed in the instructional in the previous post) also fits within this realm of animation/film manipulation as there is a conscious effort being made to add form and character with the inks applied to the film.
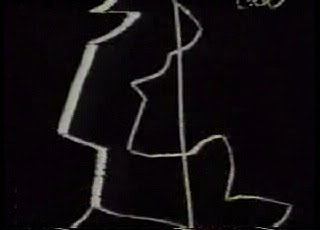
See stills from "Begone Dull Care," below:
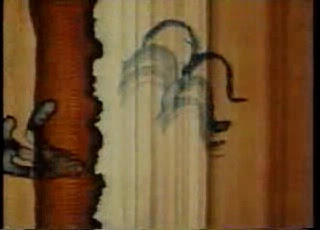
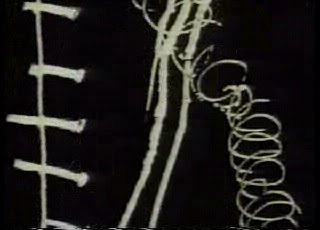
McLaren at work:
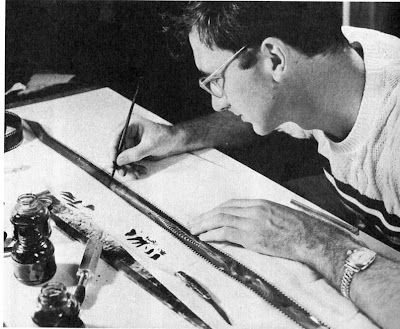
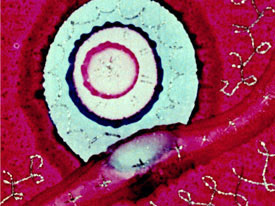
Len Lye film strips:
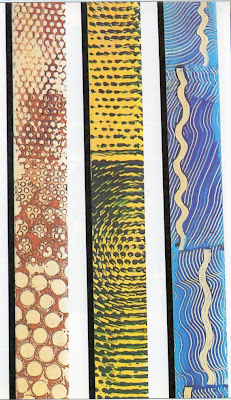
CLICK HERE to see a few direct painted on film samples from Bärbel Neubauer
This will also be a day when we make a subtle transition from film manipulation to animation. This week we will watch Norman McLaren’s 1949 animated short, “Begone Dull Care.” Like the Brakhage and Scratch Film Junkies’ films we saw on the first day of class, McLaren’s short utilizes direct film manipulation. However, in “Begone Dull Care,” we begin to see “characters” emerge in the form of shapes and lines that synchronize with the music. Compare this to the Junkies film we saw on the first day of class, where the music, it seems, is performed live as a response to the visual. McLaren does the opposite. The images in “Begone Dull Care” are a response to the music.
The 100-frame animation (detailed in the instructional in the previous post) also fits within this realm of animation/film manipulation as there is a conscious effort being made to add form and character with the inks applied to the film.
See stills from "Begone Dull Care," below:


McLaren at work:

Len Lye film strips:

CLICK HERE to see a few direct painted on film samples from Bärbel Neubauer
January 24, 2007
Frame-By-Frame Drawn On Film Animation
OK, so if animation (particularly film animation) is new to you, this is, I think, one of the best ways to be able to see how animation works. I have provided a little instructional below. Some of this, I went over in class but it always helps to have a little reinforcement.
First off, the standard speed for 16mm is 24 frames per second. I have given you a FILMSTRIP ANIMATION TEMPLATE that looks like this:
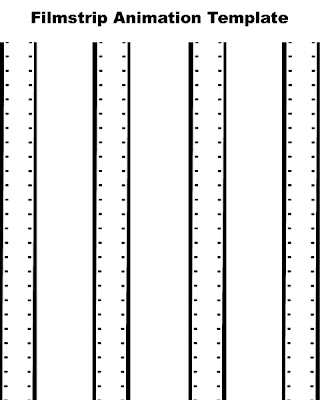
You’ll notice that there are 4 rows containing 25 frames, each. So each row represents just a smidge over 1 second. Remember that one frame of 16mm is the square formed by any 4 neighboring sprocket holes.
Now, for the animation:
Let’s say the first shape on your filmstrip animation template is a circle and let’s say by frame 25, you want that circle to morph into a square and you want the morph to be gradual.
Once you have your beginning (frame 1) and ending (frame 25) shapes for this 25 frame sequence, you’ll want to go to the midpoint between those two frames (frame 12 or 13). There, you’ll draw a squircle (half-square/half circle).
FRAME 1 - START
FRAME 12 (or 13) - THE MIDWAY POINT
FRAME 25 - END
You’ll then go to frames 6 and 18 and create two new midpoints.
FRAME 6 - THE MIDWAY POINT BETWEEN FRAME 1 and 12 (or13)

FRAME 18 - THE MIDWAY POINT BETWEEN FRAME 12 (or 13) and 25
Below are pictured the 5 keyframes side by side (you can see more clearly how this will animate).

And below is a rough, 5 keyframe animation. Note that this animation loop is 1 second long so about same the duration as your frame 1-25 animation when projected.

At this point, you have 5 keyframes and you can “tween,” or draw the frames in between, those keyframes by providing subtle frame to frame transitions. Keep repeating this process for the other three columns until you come to your end frame (100).
Once you have your template the way you like it, tape your filmstrip down enough so that it sticks but not so much that you can’t lift it up and adjust the filmstrip (without your paper tearing) to make sure it is aligned with the sprocket holes and also move the strip from column to column. You are ready to ink your film! If your sharpie isn’t offering a dark solid line (if it’s a bit watery) you may need to ink on the other side – just retrace the shape.
If you need another filmstrip animation template, CLICK HERE.
First off, the standard speed for 16mm is 24 frames per second. I have given you a FILMSTRIP ANIMATION TEMPLATE that looks like this:

You’ll notice that there are 4 rows containing 25 frames, each. So each row represents just a smidge over 1 second. Remember that one frame of 16mm is the square formed by any 4 neighboring sprocket holes.
Now, for the animation:
Let’s say the first shape on your filmstrip animation template is a circle and let’s say by frame 25, you want that circle to morph into a square and you want the morph to be gradual.
Once you have your beginning (frame 1) and ending (frame 25) shapes for this 25 frame sequence, you’ll want to go to the midpoint between those two frames (frame 12 or 13). There, you’ll draw a squircle (half-square/half circle).
FRAME 1 - START

FRAME 12 (or 13) - THE MIDWAY POINT

FRAME 25 - END

You’ll then go to frames 6 and 18 and create two new midpoints.
FRAME 6 - THE MIDWAY POINT BETWEEN FRAME 1 and 12 (or13)

FRAME 18 - THE MIDWAY POINT BETWEEN FRAME 12 (or 13) and 25

Below are pictured the 5 keyframes side by side (you can see more clearly how this will animate).

And below is a rough, 5 keyframe animation. Note that this animation loop is 1 second long so about same the duration as your frame 1-25 animation when projected.

At this point, you have 5 keyframes and you can “tween,” or draw the frames in between, those keyframes by providing subtle frame to frame transitions. Keep repeating this process for the other three columns until you come to your end frame (100).
Once you have your template the way you like it, tape your filmstrip down enough so that it sticks but not so much that you can’t lift it up and adjust the filmstrip (without your paper tearing) to make sure it is aligned with the sprocket holes and also move the strip from column to column. You are ready to ink your film! If your sharpie isn’t offering a dark solid line (if it’s a bit watery) you may need to ink on the other side – just retrace the shape.
If you need another filmstrip animation template, CLICK HERE.
January 17, 2007
starting class blogs (and vlogs)
The purpose of this blog assignment is to get in the habit of regularly writing about your experiences with and around the 6X1 class. What did you think, for example, about the first night of class where you scratched (and painted) on film? Was it the first time you ever did anything like this? Did the experience give you any ideas? What about when we saw the projected loop?
As the semester goes on, there will be class readings and assignments, or things that happen during class, which should provide good food for future writings.
In the coming weeks, we will look as a class at the process of creating video postings. If you have a digital still camera with a movie function and a USB cable, you can do this quite easily. And when you post your one-minute video, be sure to provide an explanation (it can be short) on what promted you to make the movie - or what you like about it.

welcometosixbyone
This hands-on course is designed to introduce students to a wide range of approaches and techniques of film and video production quickly, yet comprehensively, in order to demystify the production process.Over the course of the semester, students work in groups and alone to create six 1-minute-long projects based on specific assignments (i.e. cameraless filmmaking, 16mm film hand-processing, stop motion animation, rhythmic image editing, collage, etc.). The goal of this course is to expose students to alternative/experimental forms of filmmaking through a series of intensive exercises that will equip students with new creative tools while at the same time helping students develop a portfolio of creative work.
Subscribe to:
Posts (Atom)
